Installing VMwareTools on BackTrack in VMwareFusion
What you need:
- VMware Fusion: 3.0.0 — 3.0.0.
- BackTrack VMware image: 4
Quick Overview:
- Download and install VMware Fusion.
- Download the BackTrack VMware image.
- Open the Backtrack VMware image with VMware Fusion.
- Configure your virtual machine.
- Make a directory for the VMware Tools DVD to mount to.
- Mount the VMware Tools image.
- Copy the VMware tools source to your virtual machine.
- Untar the source.
- Install VMware tools from source.
- Reboot and enjoy!
Step by step:
- Setup your virtual machine. Explain
- Download and install VMware Fusion.
- Download the newest BackTrack VMware image.
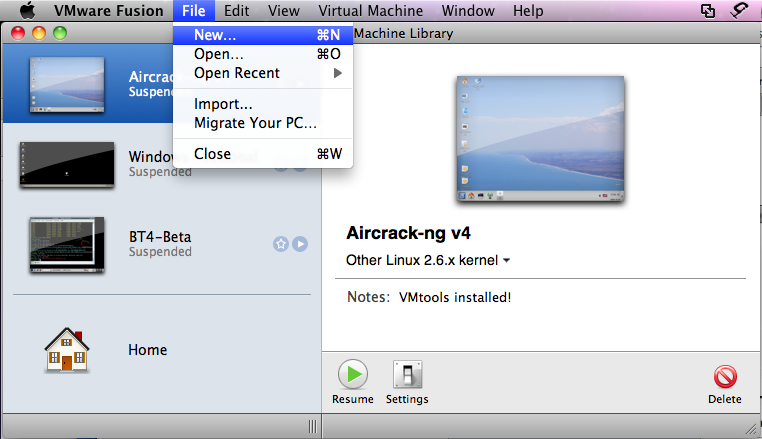
- In VMware Fusion, click on the "File" menu and select "New."
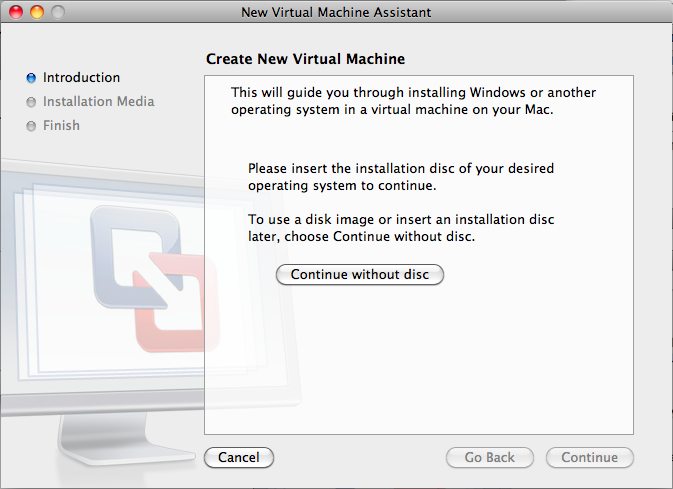
- The "New Virtual Machine Assistant" will inform you that you don't and have an install CD inserted. Just click "Ok" or "Continue without disk."
- Select "Use an existing virtual disk."
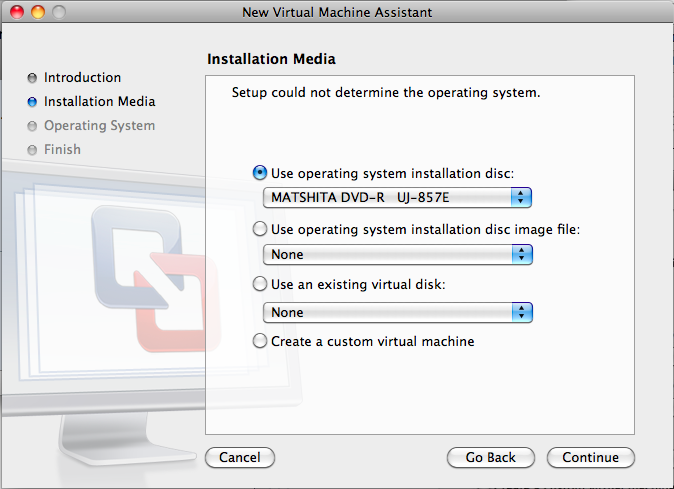
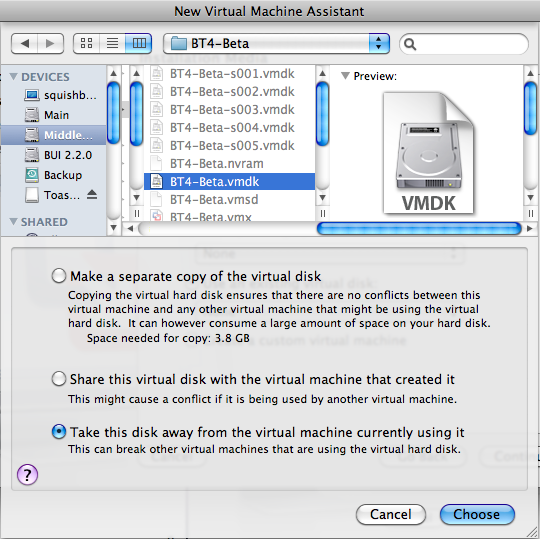
- Select the "BT4-Beta.vmdk" file from the backtrack archive you downloaded and click "Choose", then "Continue."
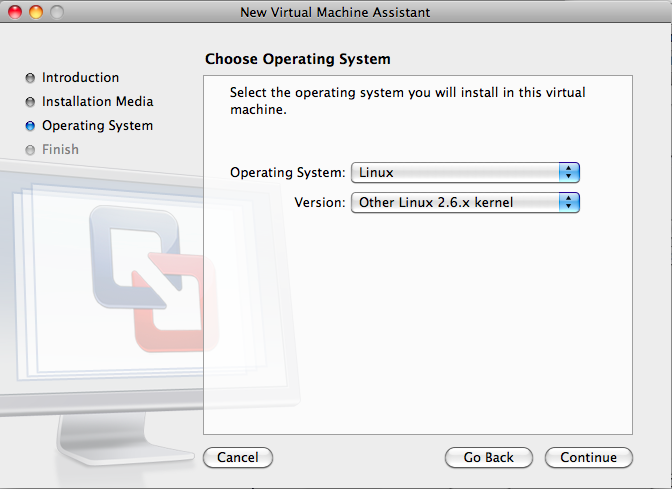
- In the "Operating System" selection menu, select "Linux." In the "Version" menu select "Other Linux 2.6.x kernel," then click "Continue."
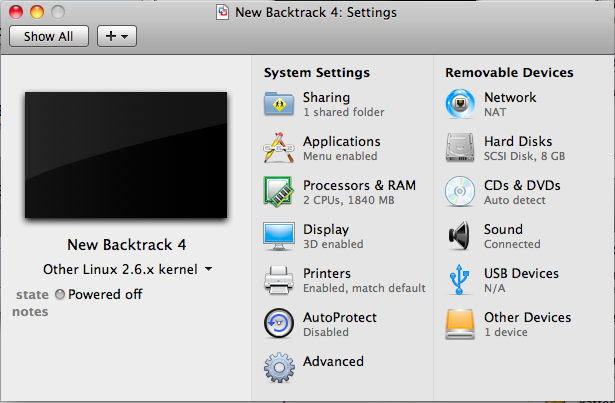
- Select "Customize Settings" and select a save as location if you wish.

- Make any configurations you want in the new window that opened, then close it.
- Double click the new image you just made in the main VMware Fusion window.
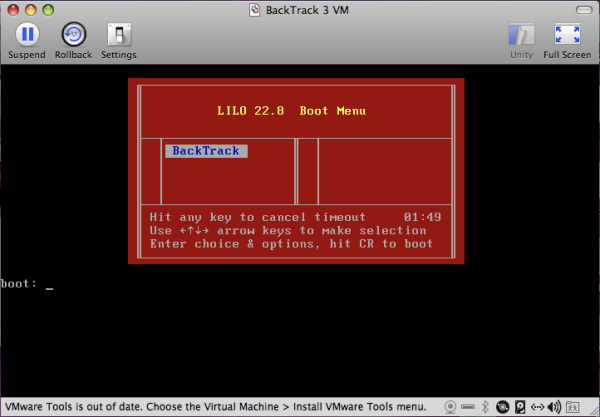
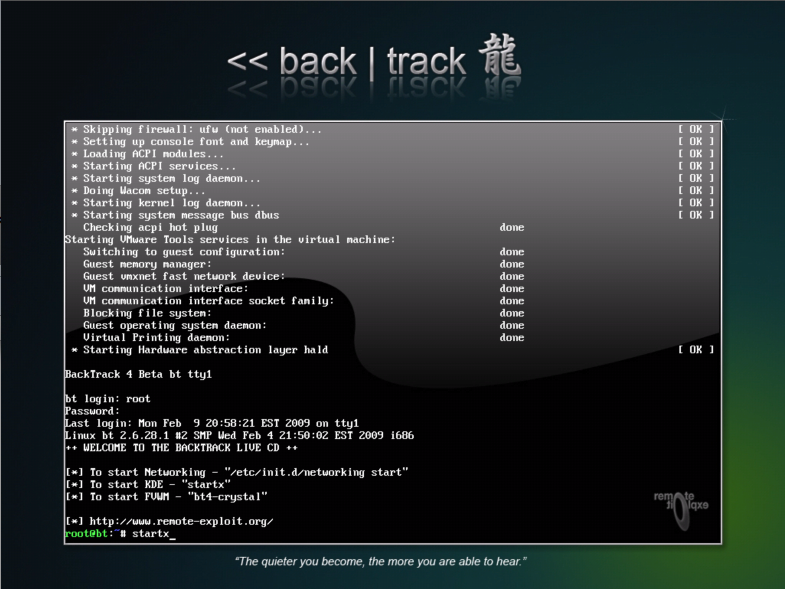
- Click inside the newly opened virtual machine, then hit enter to start the boot cycle right away if desired.
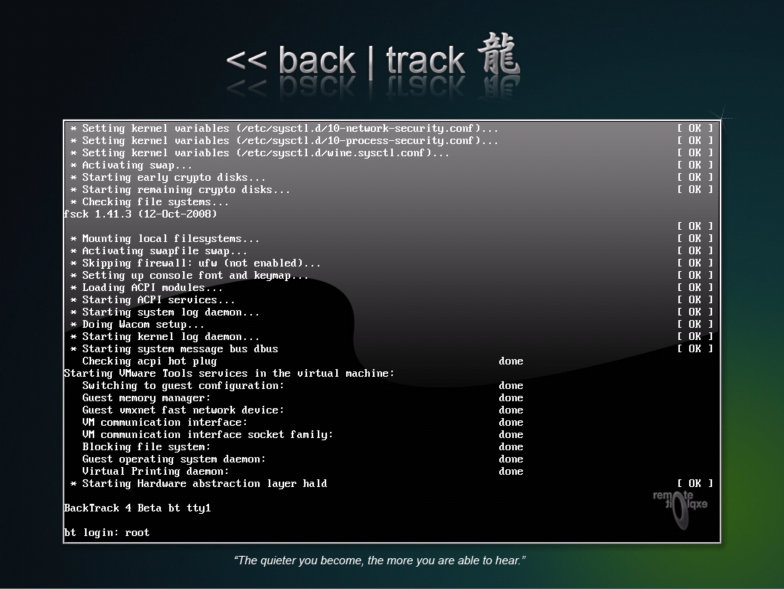
- When the system is finished booting, type root into the command prompt, then hit enter.
- Type toor and hit enter.

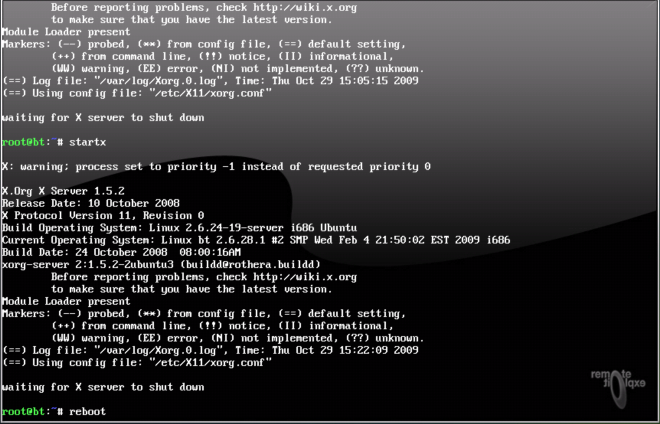
- Type startx and hit enter.
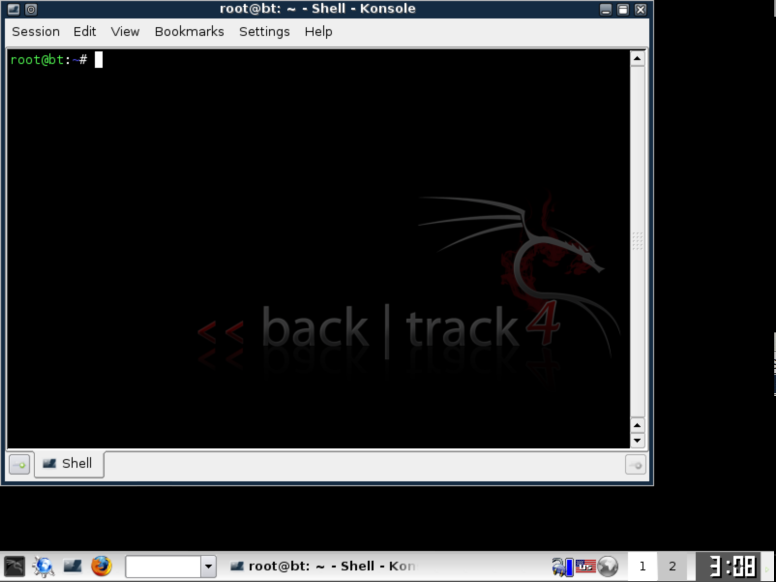
- Click on the little black icon third from the left in the lower corner of the window to open a "Shell - Konsole."
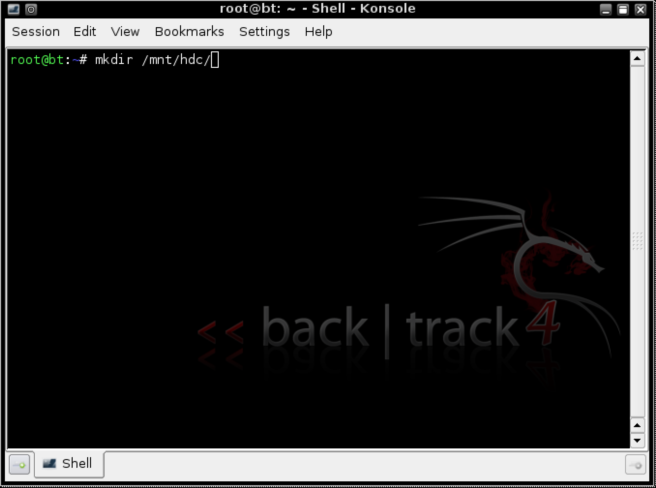
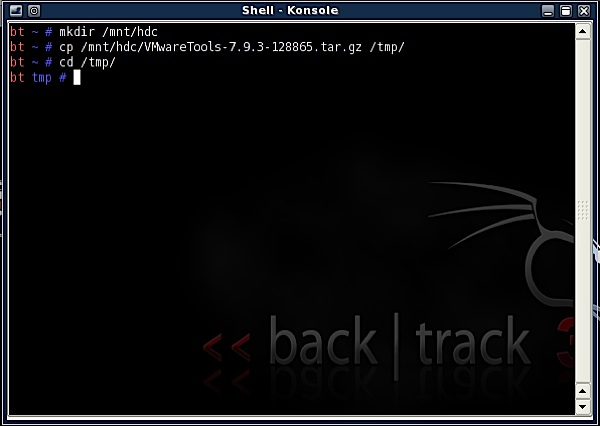
- Type mkdir /mnt/hdc then hit enter.
- Press "Command" and "Control" together to return to OS X.
- In the VMWare Fusion tool bar at the top of the computer, go to Virtual Machine->Update VMware Tools.
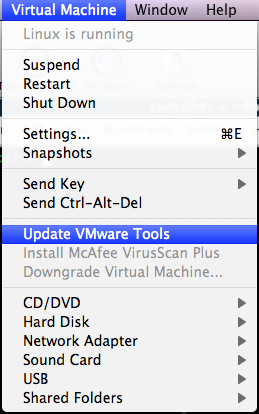
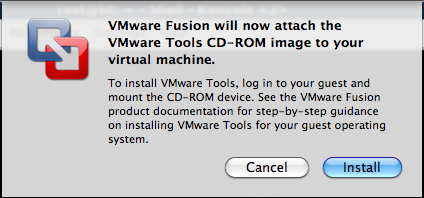
- When it warns you to have your virtual machine running, just click "Install."
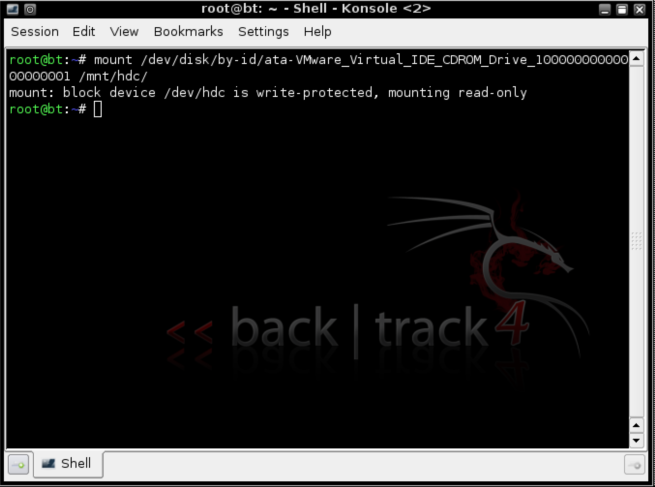
- In the open Konsole type mount /dev/disk/by-id/ata-VMware_Virtual_IDE_CDROM_DRIVE_10000000000000000001 /mnt/hdc/ and hit enter.
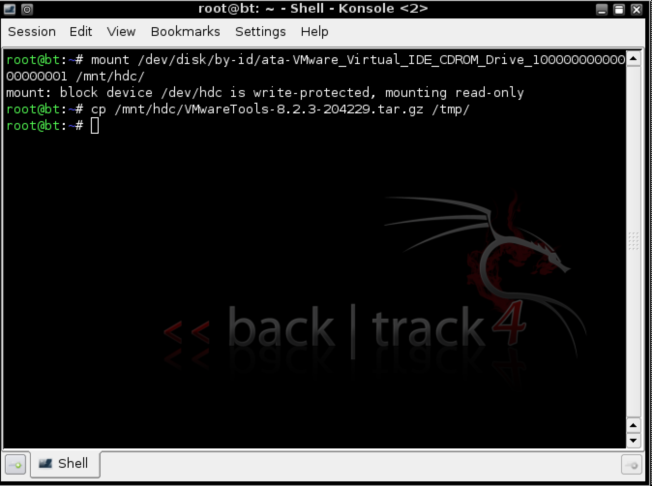
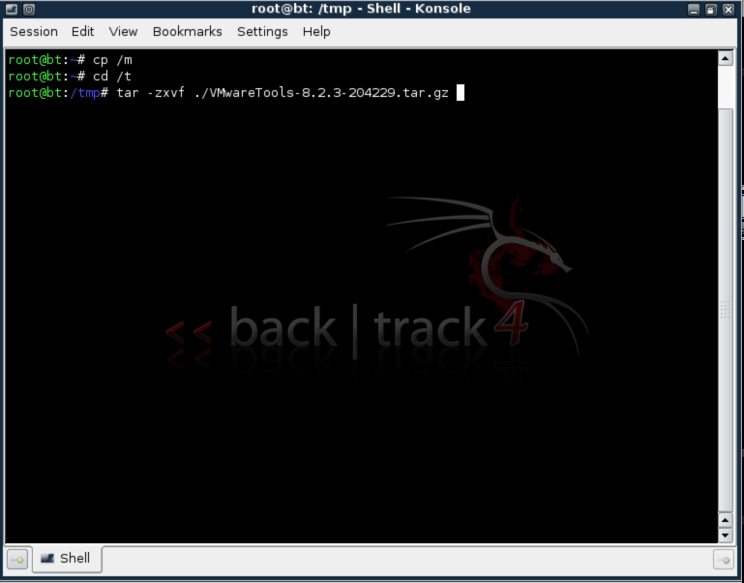
- Now type cp /mnt/hdc/VMwareTools-8.2.3-204229.tar.gz /tmp/ and hit enter.
- Next type cd /tmp/ and hit enter.
- Type tar -zxvf VMwareTools-8.2.3-204229.tar.gz and hit enter.
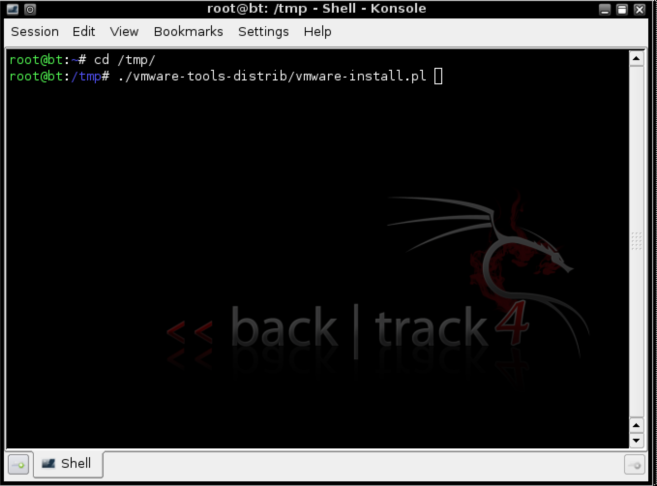
- Type ./vmware-tools-distrib/vmware-install.pl and hit enter.
- Hit enter to accept all the default install settings, or change them if you know what you're doing.
- Click the KDE icon in the lower left corner of the virtual machine, and select "Log Out..."
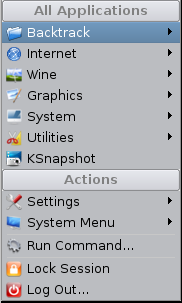
- Click "Log out."

- Type reboot and hit enter.
- When the virtual machine starts back up, repeat steps 12 through 14 hidden above.
